I recently attended a training that is required of all teachers in my district before the new school year begins. We are again changing the formatting of our required teacher websites – it was easy for me to go into the room grumpy and frustrated with the constantly changing requirements (we went through a similar switch two years ago as well). When the training began, I quickly changed my negative attitude – making our educational websites accessible is well worth our time!
We are reformatting to make our websites across the district more accessible to those with disabilities.
Of course I want my content to be easily accessible to all of my students, as well as their parents. I was instantly interested and, honestly, shocked that something like this has never been addressed. Of all the technology trainings and teacher website workshops I’ve attended this has never been discussed at any of them. We spend lots of time making sure students have individualized education plans (IEP’s), and making accommodations for students in many ways while they are with us at school; I also accommodate for those students without technology at home by providing band hall devices for them to use, but what have we done to make our websites available to be used by all, what have we done about our students ability to continue their education at home online? I now know that my online resources have been ignored – those need to be accessible, too!
Since I don’t work in my district’s technology department, I’m not sure of the specific circumstances, but I gathered at this training that at least one complaint to the ADA was made about my district. The topic of the complaint was website accessibility – hence the website re-vamp and required training. Throughout the multi-hour session, my eyes were opened to the many ways our online resources and websites need to be accessible. I’ll share some below with the caveat that I am not an expert on accessibility laws. I’m doing my best to learn, though! If you want detailed information – visit the ADA website for MANY DETAILS 🙂
Some of these accessibility requirements are overwhelming. It is tempting to roll your eyes at them, or throw up your hands and give up. I urge you to have an open minded response here – I had to remind myself to do just that. It helped me to think of a specific student who would really benefit from me making these small adjustments – that makes this work worth it.
Accessible to the visually impaired
This one was easy for me to swallow since I have had several students with visual impairments. Depending on the level of the impairment, these students (and parents and community members accessing your content) may have a text to speech (TTS) device (screen reader) or app that they use when they are on a computer. You can actually download a simple TTS app as a google chrome extension, you may have accidentally turned one on before (I know I have!) and it begins to read everything on your screen.
This is a simple thing to think about when making your content accessible – pictures cannot be read by these screen reader or TTS apps. Depending on the app, it may just tell the user “picture” – imagine how frustrating this could be to someone visiting your site, especially if you have lots of pictures. You can circumvent this problem by adding simple captions to your pictures (depending on your website host, you may have the option to create a caption and an “alt text” or alternative text – alt text is what screen readers are looking for) – this is easy to do, just takes a few extra seconds, and allows visitors to your website with a visual impairment to experience your content more fully.
Another consideration to have when it comes to those with visual impairments is to keep your text easily readable – light background, dark font. Your educational website is not the place to have a bright colored background and neon frilly font. It might seem fun, but it could keep someone from accessing your content – I promise you can express yourself in other ways aside from your background color!
Accessible to those with hearing impairments
I know a handful of talented musicians with hearing impairments, some of them former students, others colleagues and friends – they have shown me that hearing impairments are not all created equal. Some people can use implantable devices, others simply cannot. Sometimes hearing aids pick up feedback from other electronics around them, sometimes they have an annoying sound when their battery is dying. Even if a student or parent has a hearing aid to assist them, sometimes, as technology goes, they simply aren’t working properly. For all of your hearing impaired students (and even students with excellent hearing), it is helpful to have closed captions on any videos that you show or have available on your website.
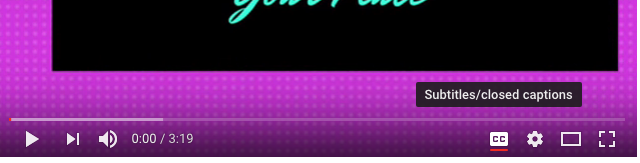
When I heard this one, I was overwhelmed – I have a lot of videos! I need to go add CC to all of them now?! As I did a little more digging on the effort that would take, I was relieved to find that YouTube adds closed captions automatically within just a few minutes of you uploading a video – all you have to do to see them is click on the small CC at the bottom right of the video window. Those with hearing impairments probably know how to do this already, but if not, you can easily show them.
Accessible to those with movement related disabilities
Many people who have a movement related disability, especially fine motor disabilities will have a device that allows them to navigate through a computer more easily. Obviously, the disability would dictate the type of device, but it might be something like a larger or simpler mouse, or large button arrows to help with navigation. These devices are so helpful and open up the online world to their users, but frustration can be met when websites are cluttered or difficult to navigate. I honestly don’t know the best solution to this aside from just keeping everything as simple as you can. Don’t have 500 options on your dropdown menus (guilty!). Keep everything looking visually clean and it will likely be more easy to navigate with assistive devices. If you have advice on this topic, please share in the comments for us all!
Accessible to those with concentration related disabilities
This one is simple and is a little bit of a tag on to some of the previous topics. Keep your website simple with minimal distractions.
Things to consider:
- Does the screen look clean, or are there opportunities to become distracted – this is tricky, and all you can do is your best, but putting forth your best effort is important
- When you embed a video, what happens at the end? We’ve all been down the YouTube rabbit hole of clicking on related video after related video. If you are embedding a YouTube video on your website for students to watch, don’t embed an entire playlist, and turn off related videos on your website host (use google to find the process for your specific website)
- Don’t add unnecessary “fluff” to your website – keep things simple so that those who have trouble focusing can make their best effort
When you are spending time creating online content for your classes, it is worth your effort to make sure that all of your students (and their parents) can access it as easily as possible. It’s important to remember the parents in this situation – they need to be able to see what their child is doing and learning – this only helps them to reinforce student learning at home! Help parents help you by making your online resources as accessible to all as possible!
Do you have other ideas on how to make websites more accessible to all? What have you done that worked for you, your students, and their parents in the past? I know I left lots of things out! Please share your ideas in the comments – we can work together on this tough topic!
Related Posts
 Be Your Own Co-Teacher!
This is one of my first “virtual co-teacher” videos that I usually show during class time at the beginning of the year to beginners. Obviously the options are endless in this […]
Be Your Own Co-Teacher!
This is one of my first “virtual co-teacher” videos that I usually show during class time at the beginning of the year to beginners. Obviously the options are endless in this […]- November Free Webinar: Google Slides and Peardeck
I can't believe that it is November and that Thanksgiving is this week!
Over the past few months, I've offered free webinars that focus on Google Tools once per month. I truly hope […]
- What is not working: posting just becauseI am a very goal oriented person.
That being said: when I decided to try this flipped classroom idea I wanted to do it all the way - a video for beginners weekly (or close to it). I have […]
- How to Google Search LIKE A BOSS
Hey there flipping friends!
I want to give you some happy October (or anytime!) encouragement before I tell you about a little fun you can have here on the interweb 🙂
October is, in […]
- That Flipping Bootcamp Week 1: Canva
If you have looked around on thatflippingbanddirector.com very much at all, you have enjoyed my Canva designs. I make them for pretty much everything. I am a little obsessed!
Your […]
- 6 Reasons All Music Educators Need Google in Their Life
Google knows more about us than I care to fully fathom and, if you are not familiar with all of the products that Google is producing, it is pretty much taking over the entire internet […]


