Alrighty, you are a pro at YouTube now – you have created an account, you can follow other channels, maybe you have even played around with your personal channel art (I would highly recommend using Canva to create art for this if you don’t have a picture you want to use!). You can create and manage your own playlists of other people’s videos and now just about all that is left is to upload your own content!
I have a lot of other posts about creating your own content, so let’s talk right now just about how to get it onto the world wide web for others to view!
Depending on where you are uploading from, there may or may not be an option for you to “upload directly to YouTube”. In many video editing apps and programs this option exists and only requires you to sign in to your YouTube account. If uploading through your app or program to YouTube, it will probably ask you to give some basic information about the video to make the upload run smoothly. If you have a video file that you are uploading yourself and not through an app or program you can simply sign in to YouTube, click on “upload” and follow the prompts.
YouTube has two settings for videos that you upload as your own: “public” and “private”. If you designate a video as being “public”, it is searchable and accessible to anyone who goes onto YouTube. This is the setting that you should use if you will be posting your video to another website or asking students to search for your video to access it. If you choose “private” it becomes difficult for just anyone to see (obviously!), however, you can invite people to see your video with an email address or google account name.
Sidenote: YouTube operates on levels – you will not have access to all of the YouTube features until you have a verified account and have met certain criteria. If you frequent your page, it will prompt you on what steps to take to have access to all of the features of YouTube in case there is one that you are dying to try!
Let’s see what all of this looks like. If you are accessing YouTube from a mobile device, it will not look the same – just scroll down to the bottom of the page and click on the option to view as a desktop or computer, then everything should look similar to these pictures:
You need to be signed in to your YouTube account to access your uploaded videos. Once signed in, you can manage all of your videos with “video manager” shown here circled in blue.
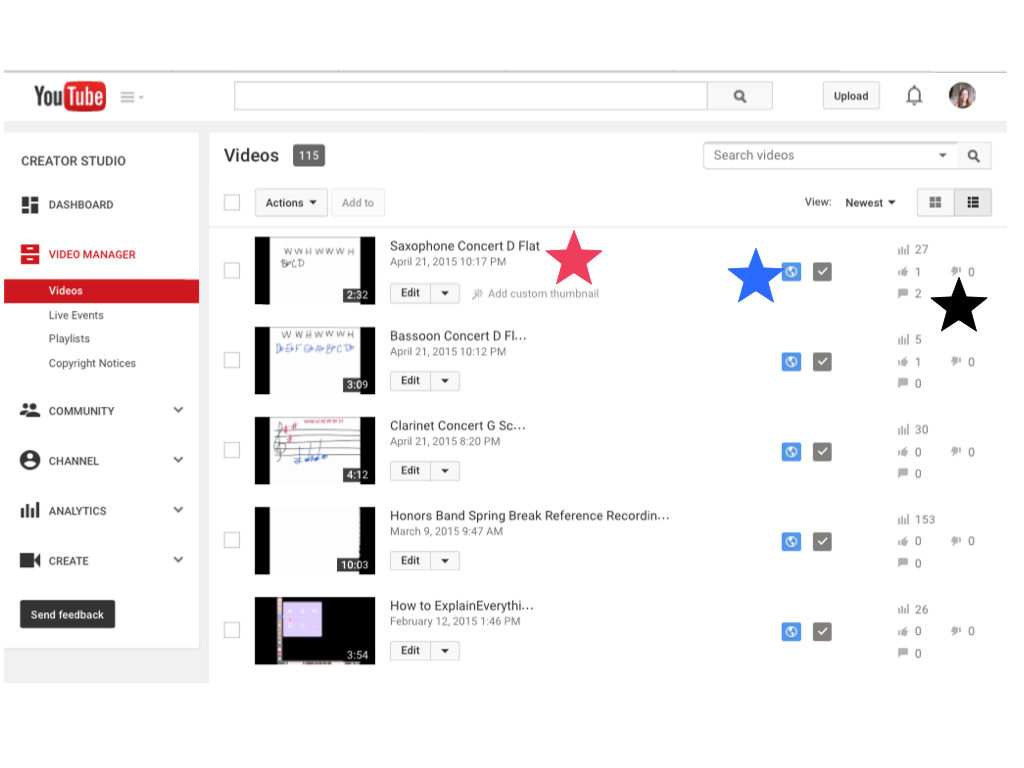
When you click on that, it will take you to this page with all of your uploaded content:
 Red star is the title and upload date of your video as well as an option to edit .. Blue star is next to the symbol for public or private. This video has a blue globe and is currently public. Black star is next to the video stats: how many total views, likes, dislikes, and comments.
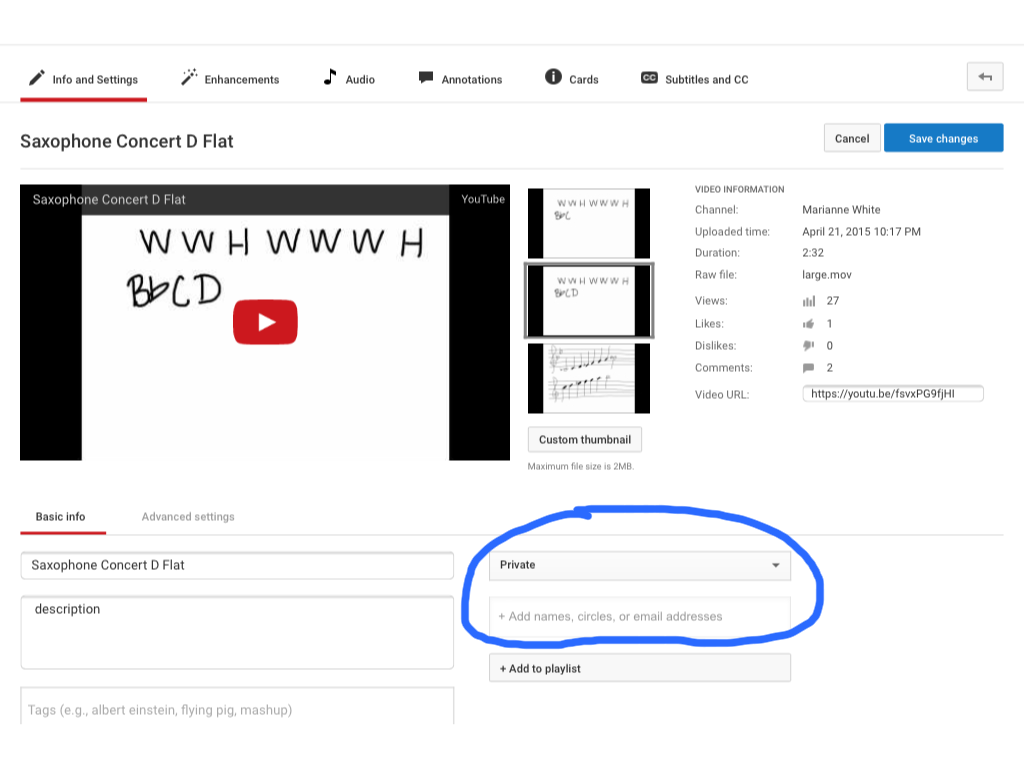
This is the edit screen. You can edit the title and description here as well as the public or private status. Notice that while this video is (temporarily) private, you can add viewers in the box underneath the status.
We’re not finished with YouTube yet – I still have a few other features to share with you and finish out our super fun youTube week – have fun exploring!


